采用开源程序pyAero批量生成高质量的多块翼型网格
原项目:
https://github.com/chiefenne/PyAero
修改后的项目:
https://github.com/sn1979c/PyAero
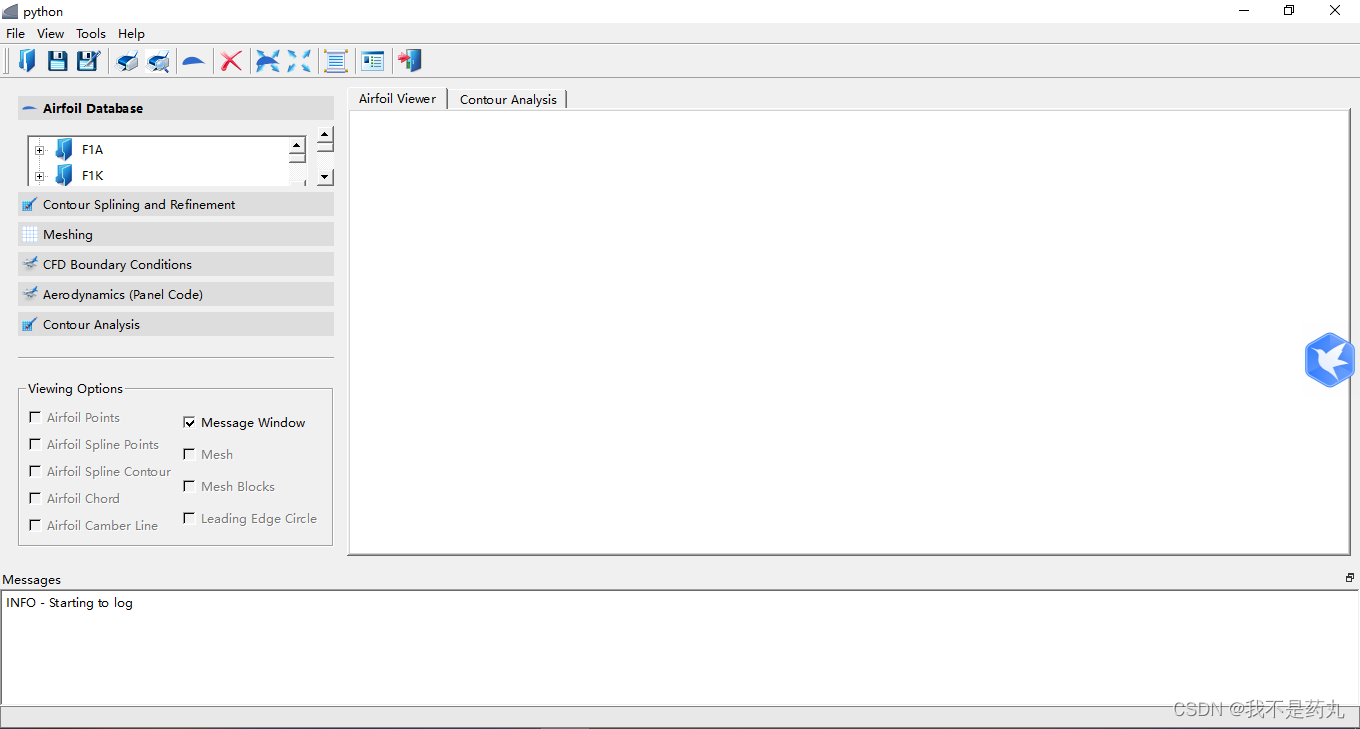
原项目采用pyside6写了一个生成多块网格的小软件,下载源代码并根据readme文件安装相关的库,将<settings.json>文件中的python编译器改成自己的,在vscode中构建程序,软件界面如下:

可以看到左侧的操作栏有6项,通过前三项就可以画出自己想要的翼型:
1. 在airfoil database中导入一个翼型,导入时会将#行视为注释。
2. 在contour splining and Refinement中平滑翼型,并给翼型添加后缘。
3. 在Meshing栏中Create Mesh,并选一个翼型格式导出。
导出SU2格式的时候有可能会出错,这似乎是这个开源代码依赖的库meshio.py的一个Bug造成的,可以找到meshio库中的__su2.py文件,把第340行改为如下所示的代码,似乎能解决这个问题:
            for index, cell_block in enumerate(mesh.cells):
            cell_type = cell_block.type
    data = cell_block.data
所生成多块网格的界面如下图所示:

在Meshing栏中不断调整网格生成的参数,满意后记录到文件data/Batch/batch_control.json中。
接着可以采用tui的方式批量生成网格,在anaconda prompt 中激活环境,并运行``python src/PyAero.py -no-gui data/Batch/batch_control.json``即可批量生成翼型网格。
如果只是想生成少量翼型的话,上述知识点已经够用了,要是还想做二次开发,可以接着往下看。
由于原项目中源码的各个程序和gui高度耦合,不能直接拿来调用,笔者将代码翼型和网格生成的代码整理成了MeshingApi.py和FoilApi.py两个Api,并去除了pyside6的gui代码,可以通过在python脚本中从外部调用两个Api来更灵活地生成网格。
可以参考下述项目中的api文件,LoadBatch.py是采用两个Api批量生成翼型网格的示例。注意原项目中是没有API这个文件的。
https://github.com/sn1979c/PyAero
注:如果你要把这两个Api复制到其他地方用,你需要注意把Utils.py这个依赖也复制走。
总的来说,生成网格的流程如下所示:
airfoil = FoilApi(foilname)
# 读取翼型
airfoil.readContour(foilpath, '#')
接着修改refine翼型的参数,默认参数如下所示:
airfoil.refine_parameters = {
    "Airfoil contour refinement": {
    "Refinement tolerance": 172.0,
    "Refine trailing edge old": 3,
    "Refine trailing edge new": 6,
    "Refine trailing edge ratio" : 3,
    "Number of points on spline" : 200
    },
    "Airfoil trailing edge": {
    "Upper side blending length": 30.0,
    "Lower side blending length": 30.0,
    "Upper blending polynomial exponent": 3,
    "Lower blending polynomial exponent" : 3,
    "Trailing edge thickness relative to chord" : 0.4
    }
}
修改后refine翼型、给翼型添加后缘(可选):
airfoil.doSplineRefine()
airfoil.addTrailingEdge()
之后就可以查看翼型的形状了,翼型点的数据储存在spine_data的第一项:
f = airfoil.spline_data[0]
plt.plot(f[0], f[1])
plt.legend()

将网格生成参数改成之前在软件里记下来的值,并生成网格,默认值如下:
# make mesh
wind_tunnel = MeshingApi.Windtunnel(airfoil)
# 默认参数
wind_tunnel.mesh_parameters = {
    "Airfoil trailing edge": {
    "Upper side blending length": 30.0,
    "Lower side blending length": 30.0,
    "Upper blending polynomial exponent": 3,
    "Lower blending polynomial exponent" : 3,
    "Trailing edge thickness relative to chord" : 0.4
    },
    "Airfoil contour mesh": {
    "Divisions normal to airfoil": 15,
    "1st cell layer thickness": 0.004,
    "Cell growth rate": 1.05
    },
    "Airfoil trailing edge mesh": {
    "Divisions at trailing edge": 3,
    "Divisions downstream": 15,
    "1st cell layer thickness": 0.004,
    "Cell growth rate" : 1.05
    },
    "Windtunnel mesh airfoil": {
    "Windtunnel height": 3.5,
    "Divisions of tunnel height": 100,
    "Cell thickness ratio": 10.0,
    "Distribution biasing" : "symmetric"
    },
    "Windtunnel mesh wake": {
    "Windtunnel wake": 7.0,
    "Divisions in the wake": 100,
    "Cell thickness ratio": 15.0,
    "Equalize vertical wake line at" : 30.0
    }
}
# 生成网格 wind_tunnel.makeMesh()
接着也可以用pyplot来画出翼型网格:
wind_tunnel.drawMesh()

导出不同格式的网格,这里这个fluent的导出程序是我自己写的,边界条件全给成farfield了,meshio的导出程序有点问题,其他的导出格式我都没测试过。
output_formats = ['FLMA', 'FLUENT']
for output_format in output_formats:
    extension = {'FLMA': '.flma',
                 'SU2': '.su2',
                 'GMSH': '.msh',
                 'VTK': '.vtk',
                 'CGNS': '.cgns',
                 'ABAQUS': '.inp',
                 'FLUENT': '.msh'}
    mesh_name = os.path.join(mesh_path, basename   extension[output_format])
    getattr(MeshingApi.BlockMesh, 'write' output_format)(wind_tunnel, name=mesh_name)
采用上述方法,可以采用脚本控制生成翼型的网格,程序生成网格的方法为先生成每个块的网格BlockMesh,再用Connect类将各个BlockMesh连接起来。如果想对具体的网格生成算法研究,可以去修改具体某个Blockmesh的网格生成程序,在make_mesh程序中将其添加进去即可。
pyAero生成网格的质量和journal文件相比控制ICEM生成的网格质量相比还是比较高的,并且程序框架比较清晰,具体的网格生成算法也可以在上面做进一步的开发。


