
STAR CCM 案例|重叠网格计算翼型跨声速流动

本教程演示如何使用重叠网格模拟RAE2822翼型上的跨音速流动。
1 问题描述
通过对机翼周围区域使用重叠网格,本教程演示如何在不生成网格的情况下更改攻角。这种方法大大简化了参数研究的案例设置。
2 STAR CCM 设置
启动STAR CCM 并新建Simulation 利用菜单File > Load Simulation导入文件airfoil_oversetParts.sim
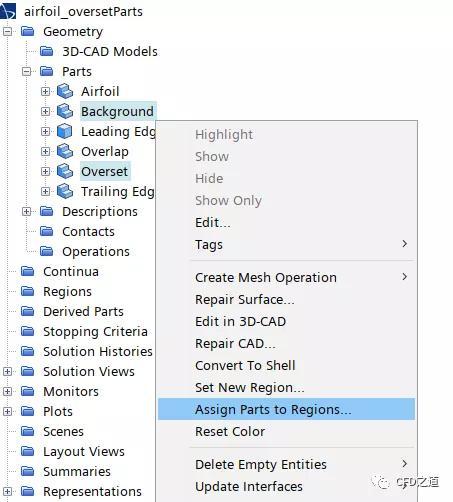
2.1 区域处理
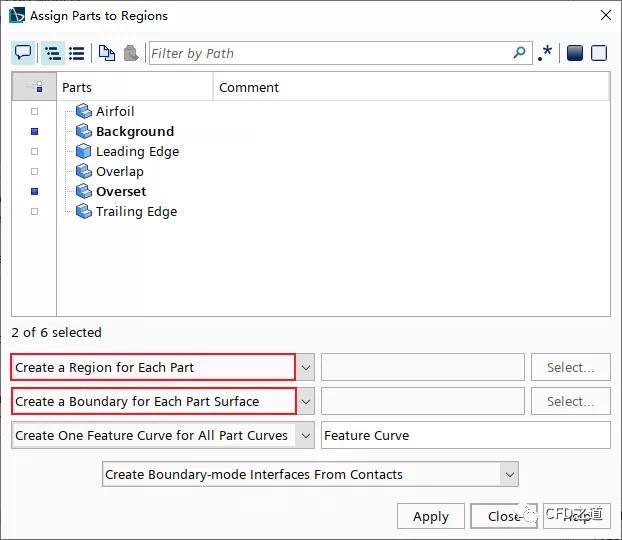
选择模型树节点Part下的子节点Background与Overset,点击右键菜单项Assign Parts to Regions…分配区域
弹出对话框中选择选项Create a Region for Each Part、Create a Boundary for Each Part Surface,如下图所示
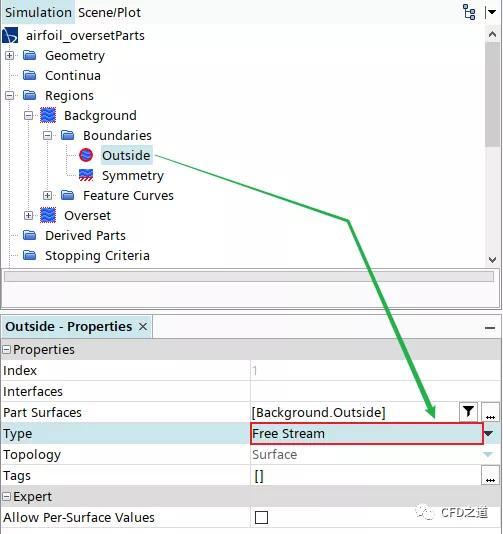
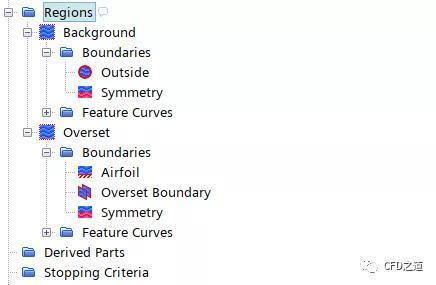
选中模型树节点Regions > Background > Boundaries > Outside,设置其边界类型为Free Stream
设置边界Symmetry的类型为Symmetry Plane 相同方式设置Overset节点下的边界 设置 Airfoil的边界类型为Wall设置 Overset Boundary的边界类型为Overset Mesh设置 Symmetry的边界类型为Symmetry Plane
修改完毕后的边界节点如下图所示。
2.2 网格生成
1、背景网格
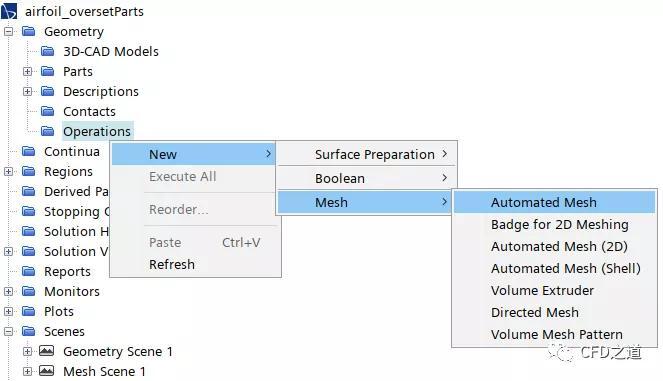
鼠标右键选择模型树节点Operations,点击弹出菜单项New → Mesh → Automated Mesh打开网格生成面板
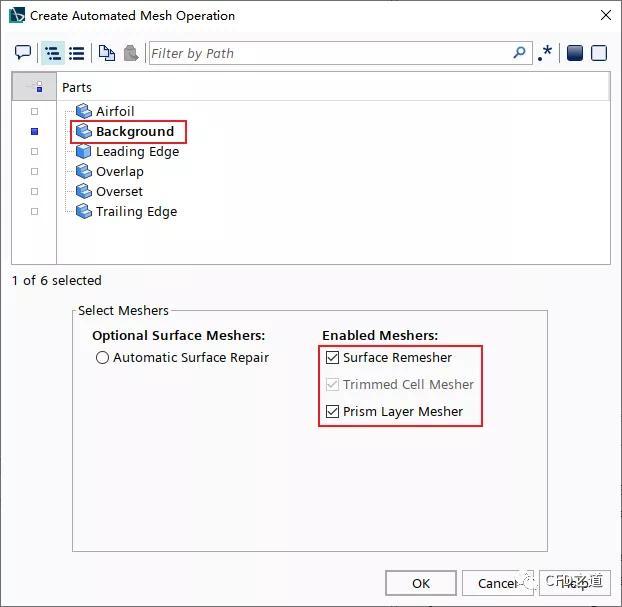
选中部件Background,选择选项Surface Remesher、Trimmed Cell Mesher及Prism Layer Mesher,如下图所示
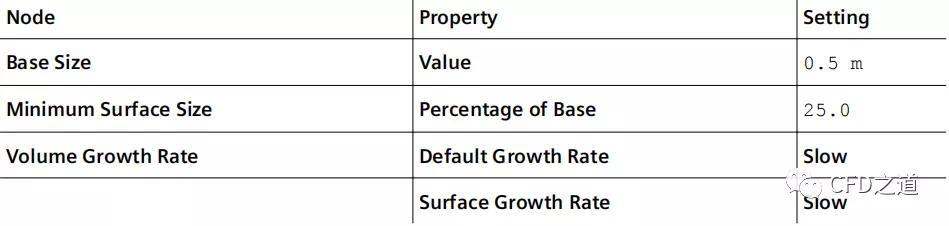
修改节点Operations > Automated Mesh名称为Background Mesh 进入模型树节点Operations > Background Mesh > Default Controls,如下表所示设置相应参数
鼠标右键选择模型树节点Operations > Background Mesh > Custom Controls,点击弹出菜单New → Volumetric Control新建体控制
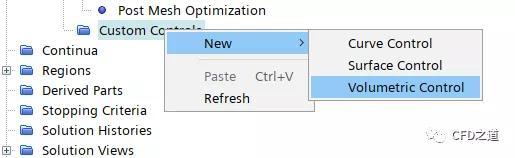
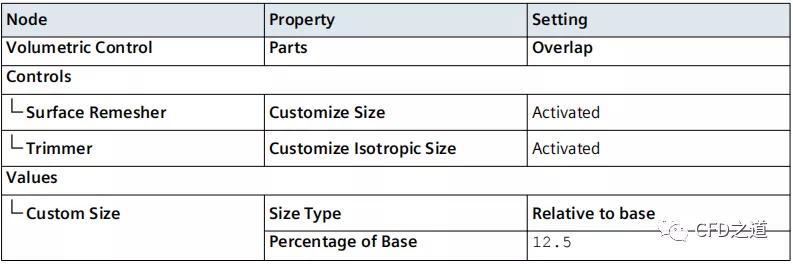
设置Parts为Overlap
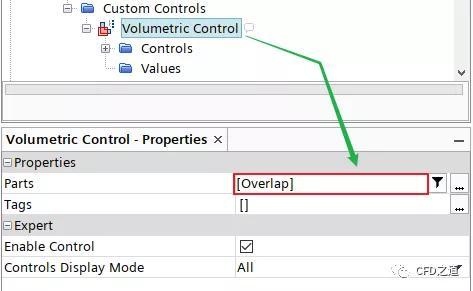
如下表所示设置相应参数
2、前景网格
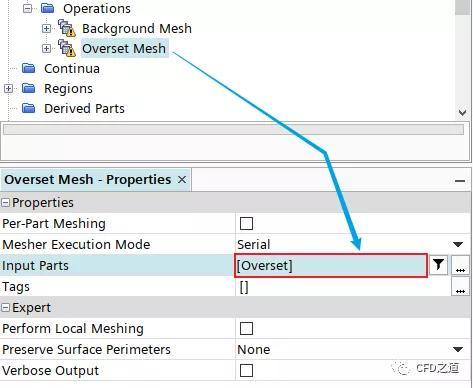
拷贝并粘贴节点Background Mesh,修改节点名称为Overset Mesh 如下图所示,指定 Input Parts为Overset
选中模型树节点Overset Mesh > Meshers > Prism Layer Mesher,设置 Disribution Mode为Wall Thickness
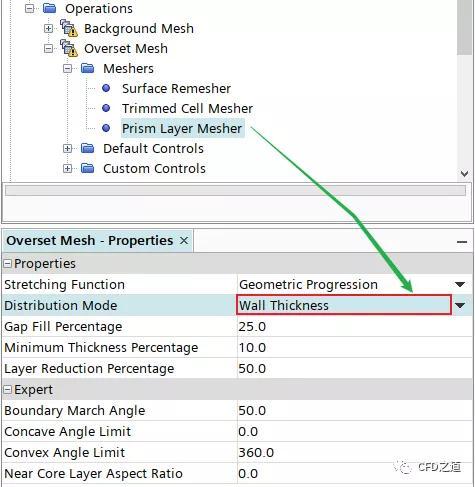
进入模型树节点Operations > Overset Mesh > Default Controls,按下表所示参数设置相应节点
| Node | Property | Setting |
|---|---|---|
| Base Size | Value | 0.5 m |
| Number of Prism Layers | Number of Prism Layers | 15 |
| Prism Layer Total Thickness | Percentage of Base | 15 |
| Prism Layer Near Wall Thickness | Value | 1.0E-4 m |
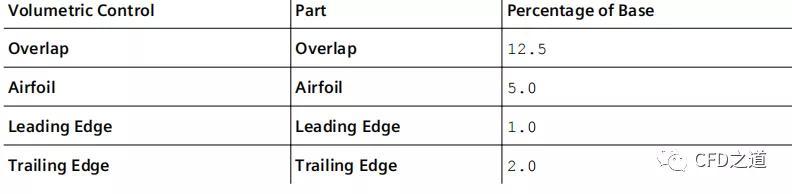
添加4个Volumetric Control,采用下表所示的部件与尺寸
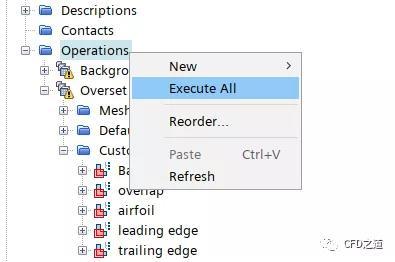
右键选择模型树节点Operatons,点击弹出菜单项Execute All生成计算网格
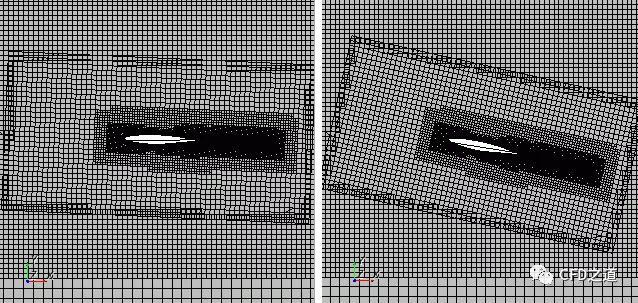
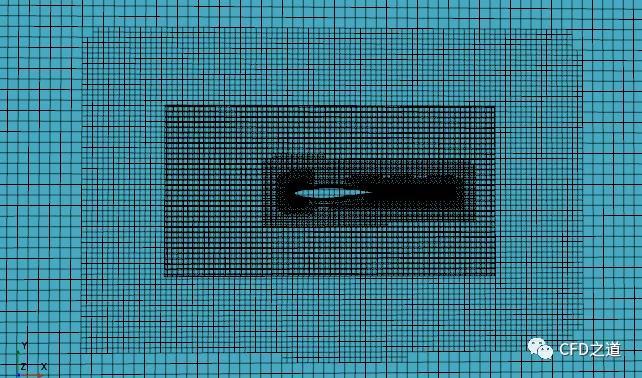
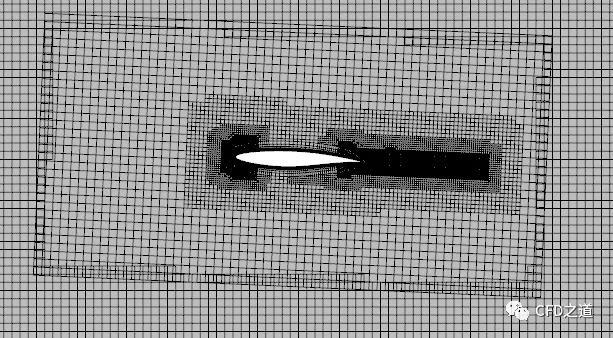
计算网格如下图所示。
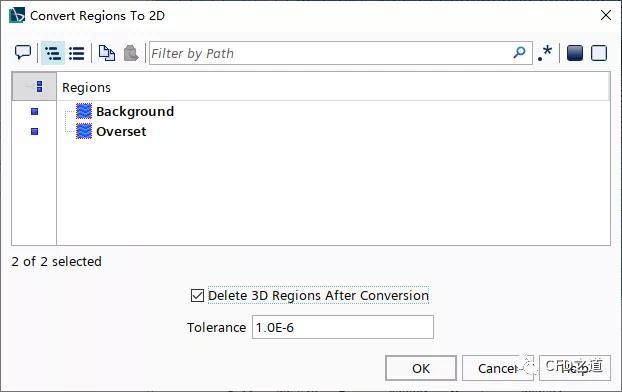
点击菜单项Mesh > Convert to 2D将三维网格转换为二维。注意在弹出对话框中激活选项Delete 3D Regions After Conversion
2.3 指定攻角
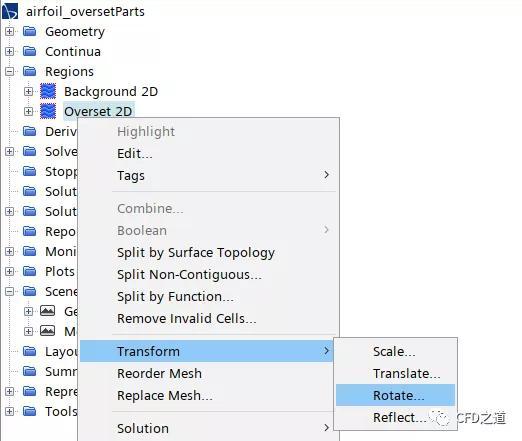
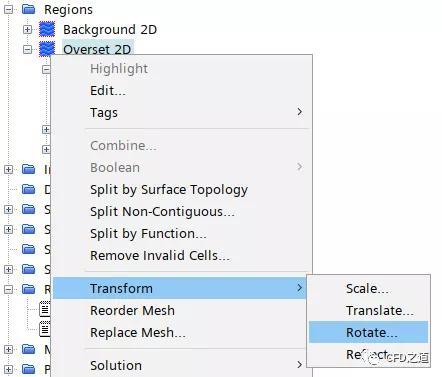
右键选择节点Regions > Overset 2D,点击弹出菜单项 Transform > Rotate打开区域旋转对话框
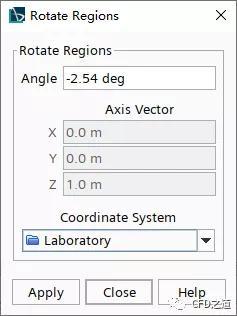
如下图所示,指定旋转角度为**-2.54 deg**,点击按钮Apply旋转区域
2.4 耦合重叠区域
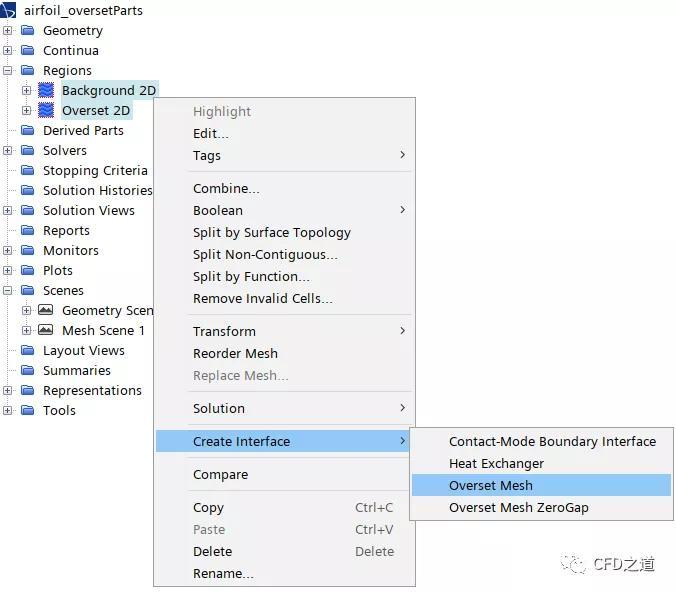
选中节点Background 2D及Overset 2D,点击弹出菜单项Create Interface → Overset Mesh创建重叠网格区域
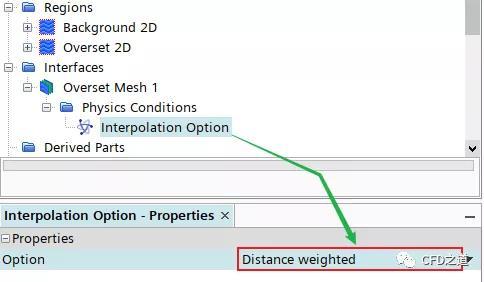
选中节点Intefaces > Overset Mesh 1 > Physics Conditions > Interpolation Option,设置 Option为Distance weighted
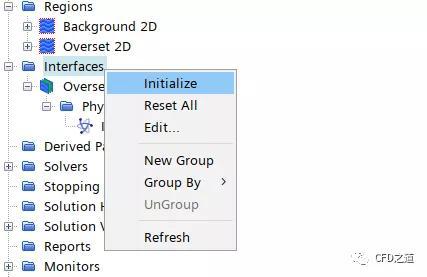
右键选择模型树节点Interfaces,点击弹出菜单项Initialize进行初始化
网格如下图所示
2.5 选择物理模型
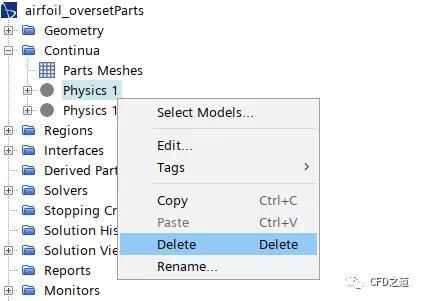
鼠标右键选择模型树节点Physics 1,点击弹出菜单项Delete删除该节点
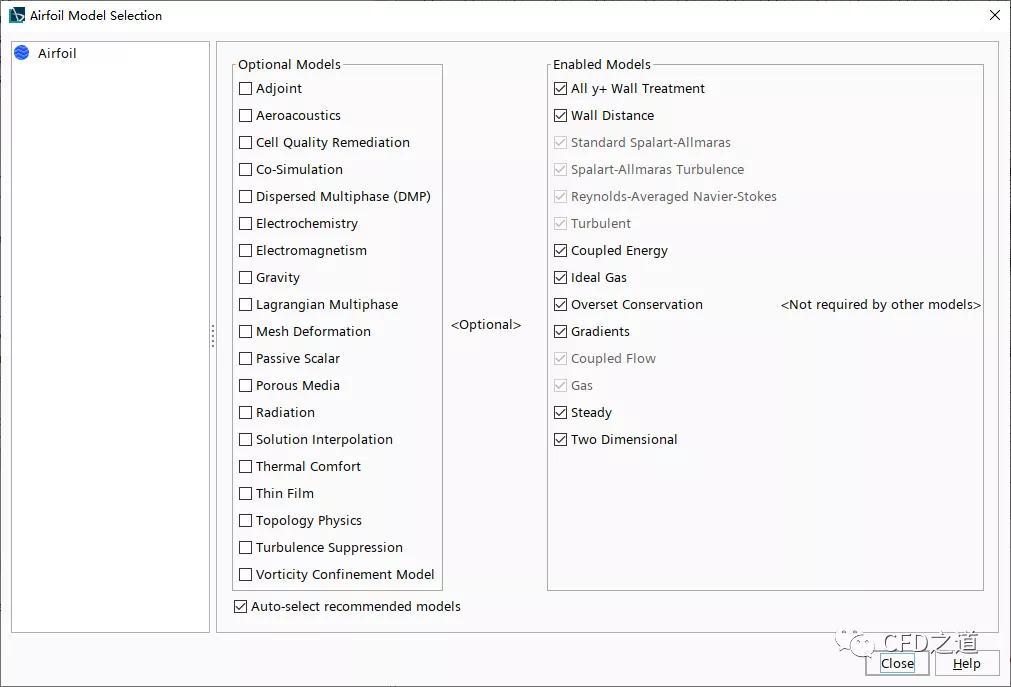
修改节点Continua > Physics 1 2D的名称为Airfoil 鼠标右键选择节点Airfoil,点击弹出菜单项**Select Models…**打开模型选择对话框

选择以下物理模型 Two Dimensional Steady Gas Coupled Flow Ideal Gas Turbulent Spalart-Allmaras Turbulence
选择完毕的模型对话框如下图所示。
2.6 设置初始化条件
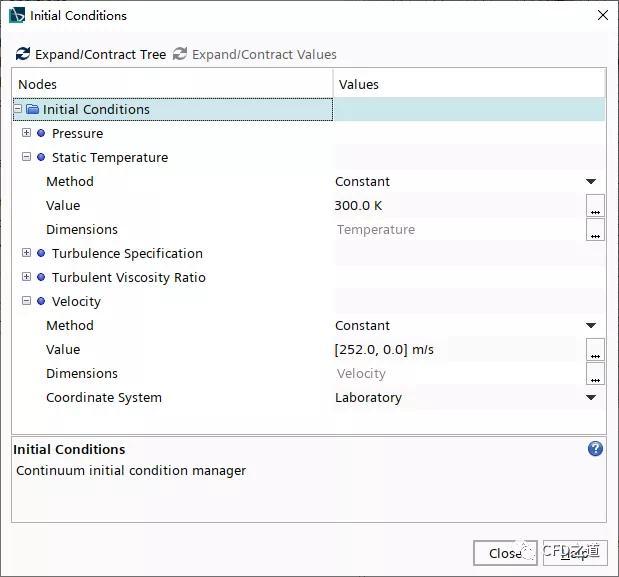
双击模型树节点Fluid > Boundaries > freestream > Physics Values,如下图所示设置边界条件
2.7 设置材料参数
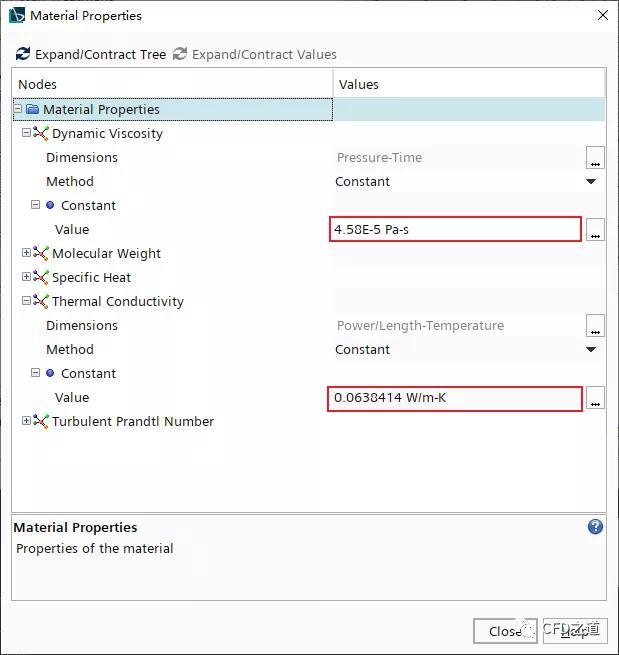
双击模型树节点Models > Gas > Air > Material Properties,如下图所示设置材料参数
2.8 设置边界条件
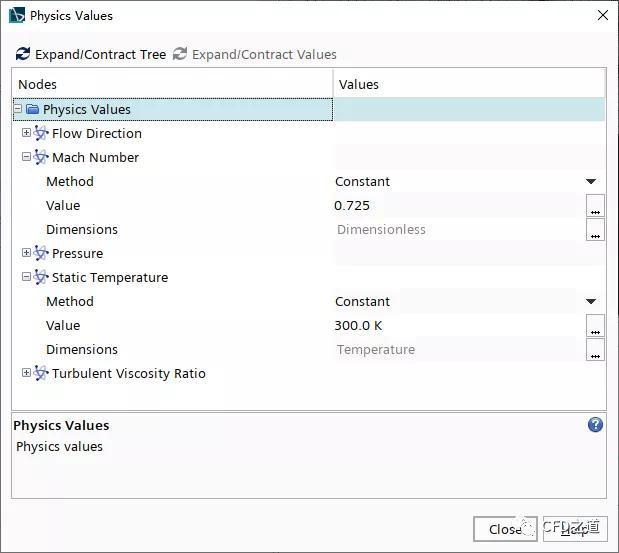
鼠标双击模型树节点Regions > Background 2D > Boundaries > Outside > Physics Values,如下图所示设置边界条件
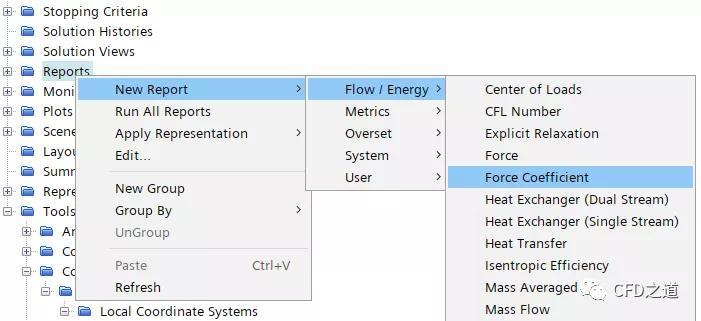
2.9 物理量监测
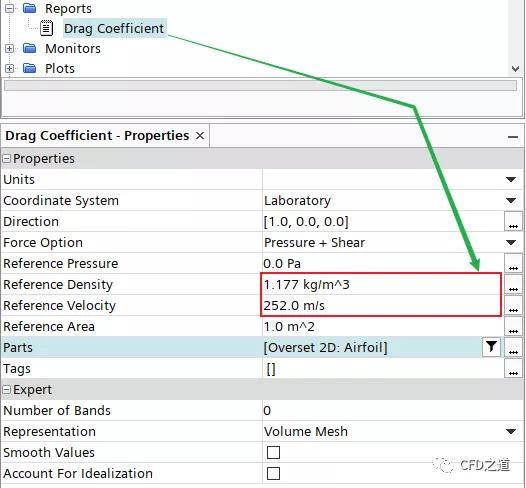
右键选择模型树节点Report,点击菜单项New Report > Flow / Energy > Force Coefficient创建 Drag Coefficient
如下图所示指定阻力系数相关参数
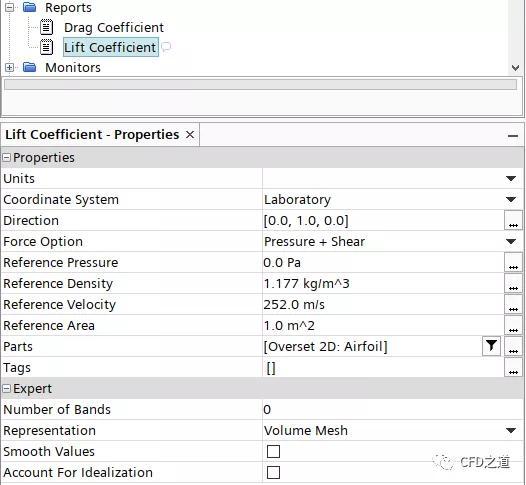
相同的方式创建升力系数
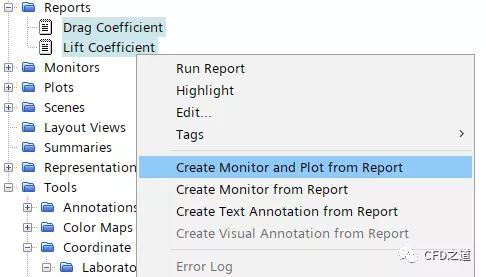
创建阻力系数与升力系数的监控及报告
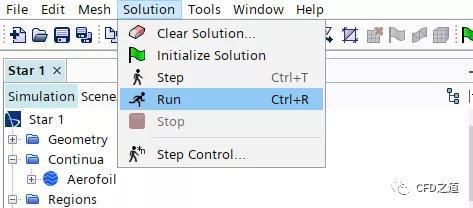
2.10 进行计算
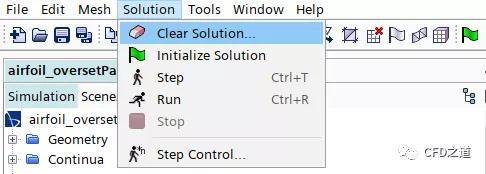
选择菜单Solution → Run进行计算
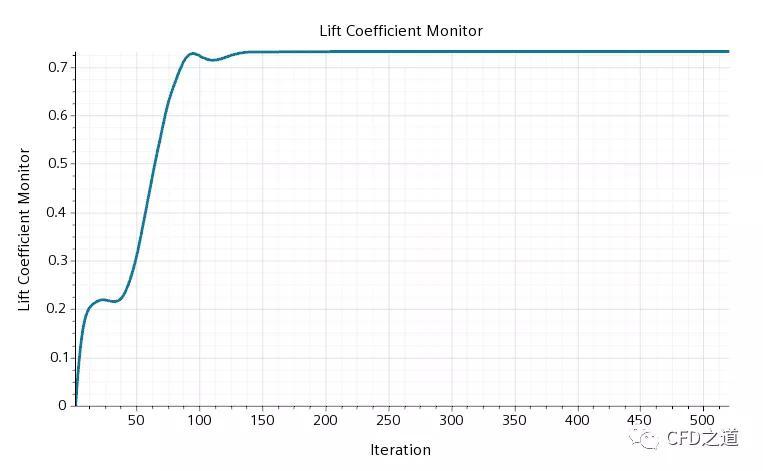
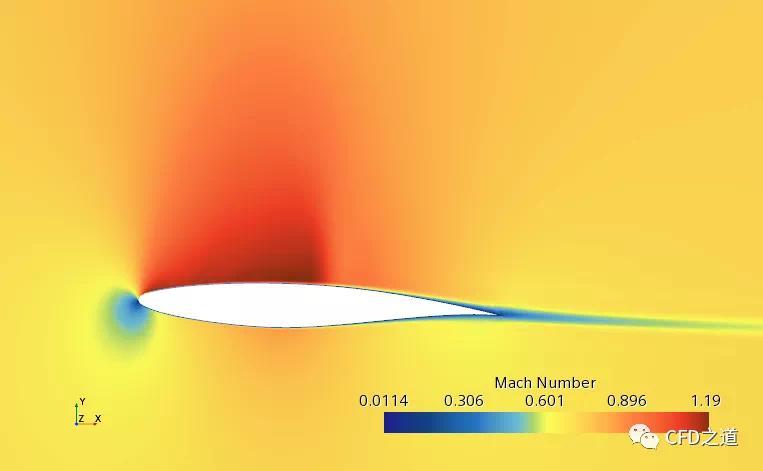
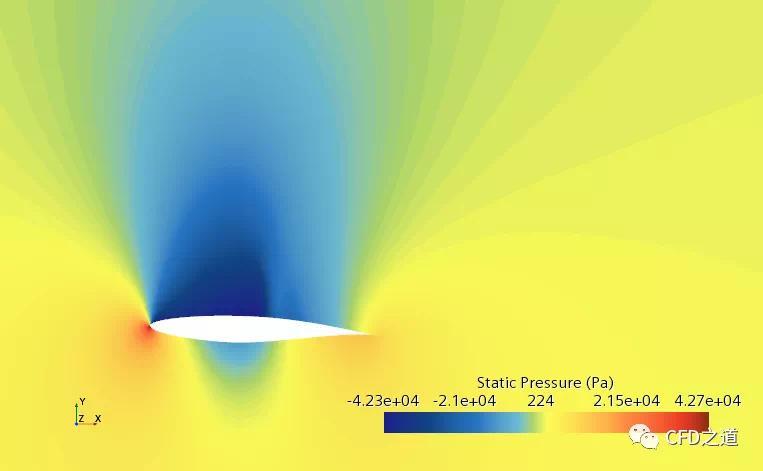
3 计算结果
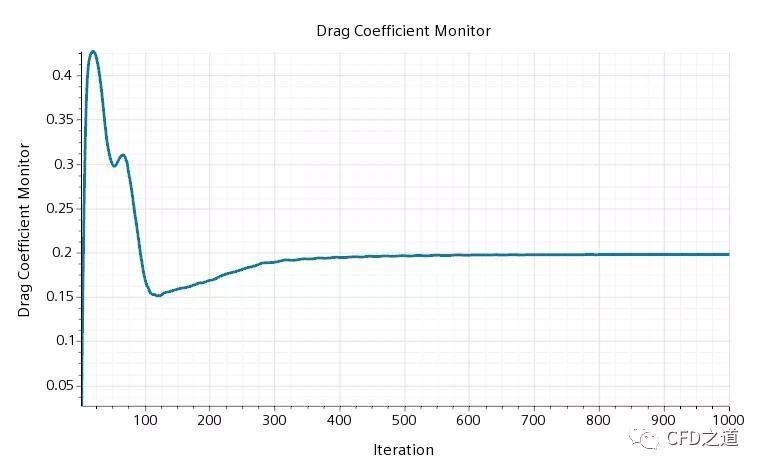
阻力系数随迭代变化

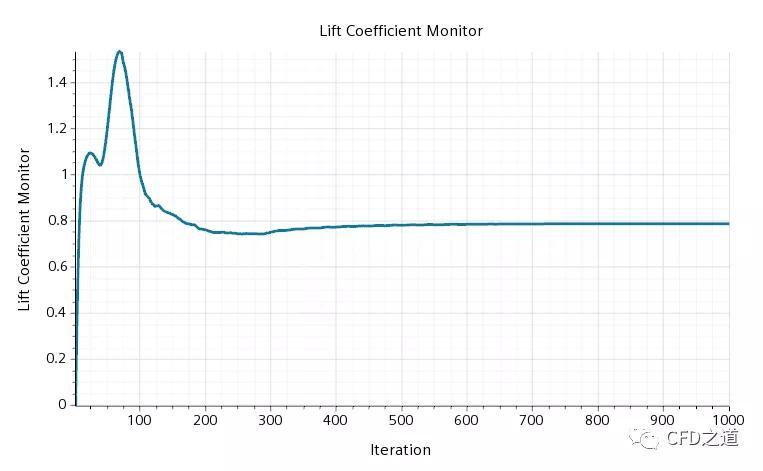
升力系数随迭代变化
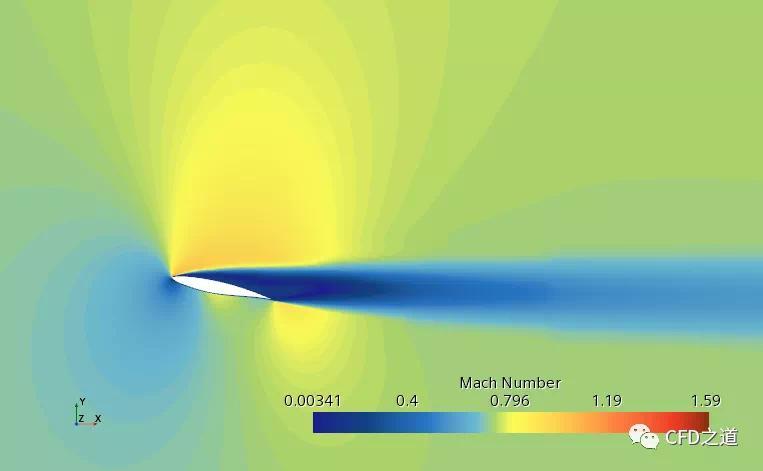
马赫数分布
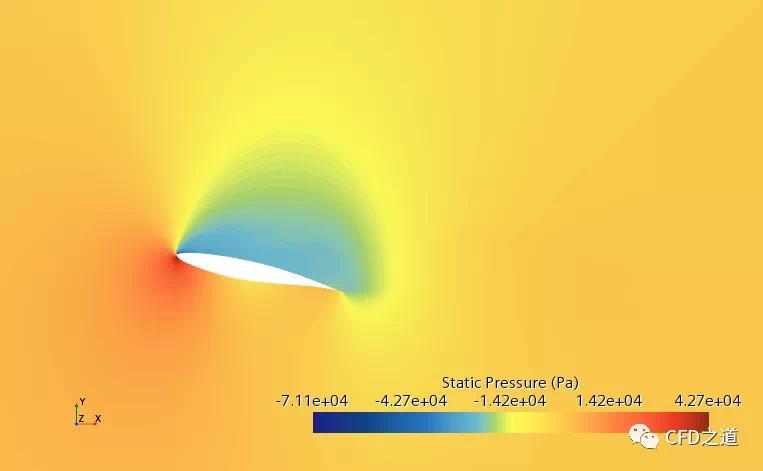
压力分布
4 修改攻角计算
右键选择模型树节点Overset 2D,点击弹出菜单项Transform → Rotate… 打开区域旋转对话框
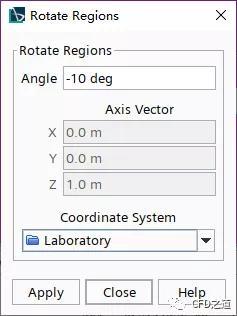
如下图所示设置旋转角度为 -10 deg
重新开始计算
阻力系数
升力系数
压力分布
马赫数分布
来源:CFD之道
登录后免费查看全文
著作权归作者所有,欢迎分享,未经许可,不得转载
首次发布时间:2021-11-29
最近编辑:2年前

博士
|
教师
探讨CFD职场生活,闲谈CFD里外


相关推荐
最新文章
热门文章
